Monday, March 26, 2012

Library Card Holders - FREEBIE - Lots of Good Uses

Take a gander at these 41 freebie library card holders.  There are a variety for almost any occasion. Click on the link below.  Enjoy!
FREEBIE LIBRARY CARD HOLDERS

Sunday, March 25, 2012

Coordinate Grid Game

For those of you who remember the game Battleship, this game is played the same way.  It is called Apples and Worms. This idea came from a Mailbox magazine idea.  My kids love it.  All you need is a piece of construction paper and grid paper.  The students draw two 10 x 10 arrays on each half of the paper, number the grids, and draw 10 apples and 10 worms on the top grid only.  They glue the grid onto the construction paper and they are ready to go!  With a partner, each child takes a turn calling out an ordered pair. The results for the turn are written on the blank 10 x 10 grid.  (The students will either put an apple, a worm, or an x for no item at the coordinate called out.)  The object is to get the most apples.  Play is stopped when one partner has 5 worms.  Then the partners count their apples.  The student with the most apples wins.  (I give a small prized to each winner.)

Saturday, March 17, 2012

Pinterest!

I had been hearing all the buzz about Pinterest for the last year and had purposely stayed away from it because I knew I would like it.  I finally gave in and joined a couple of weeks ago and I don't like it...I LOVE it!  I have found so many great ideas not only for school, but for everything!  I am going to have to pace myself :)  

Tuesday, March 13, 2012

Great Book For Introducing Coordinate Grids

I just wanted to share a book I use each year when I introduce coordinate grids to my kiddos.  The Fly on the Ceiling by Dr. Julie Glass is a small read-aloud book that loosely uses historical fiction, (called a myth on the front of the book) to spin an imaginary version of how the coordinate system was created.


Sunday, March 11, 2012

The ABC Posters of Oz, Lb, T

My students really enjoyed creating the ABC weight posters.  I placed their finished work in the hallway outside my classroom.  However, the illustrations would make a cute ABC book as well!  


I assigned each student a different letter of the alphabet, excluding letters that would be difficult to find items of weight.  
On a white piece of construction paper, my students labeled the front side of the paper "pounds."  Then I had them draw pictures of items that used pounds as a unit of measure.  My kids had already had experiences finding a pound before this activity.  I placed (1) dictionary, (1) lb weight, and (1) oz weight, and markers, crayons, and colored pencils on each group of 4 desks as resources to help them complete 4-5 illustrations of items measured with pounds.  It took 2 (1) hour math periods to complete.  They had the best time with this activity!


Many students took the activity very seriously.  They went home and made lists of words that began with their letter for the next day.


When they finished the "pounds" side, they flipped their papers over and did the same thing using "ounces."  Of course, there are always the early finishers, so I assigned them "tons" and another piece of construction paper. It was a great activity and the kids still keep asking if we can do it again :)  They keep thinking of new illustrations!


Although the assignment was to illustrate 4-5 items on the posters, my kids just got carried away!


Tuesday, March 6, 2012

WEIGHT a minute!

My students have been working on a weight unit.  We cover grams, kilograms, ounces, pounds, and tons in this unit.  The first activity the students completed involved understanding grams and finding benchmarks to help them remember "about" how heavy a gram is.  Of course, my favorite benchmark is a large paperclip.  The activity was divided into 3 parts.  It took about an hour to complete.
Before we began the activity I introduced my class to the concept of grams.  They held tiny gram weights and my favorite gram, a large paperclip.  Next, my students brainstormed other items that might weigh about an gram.

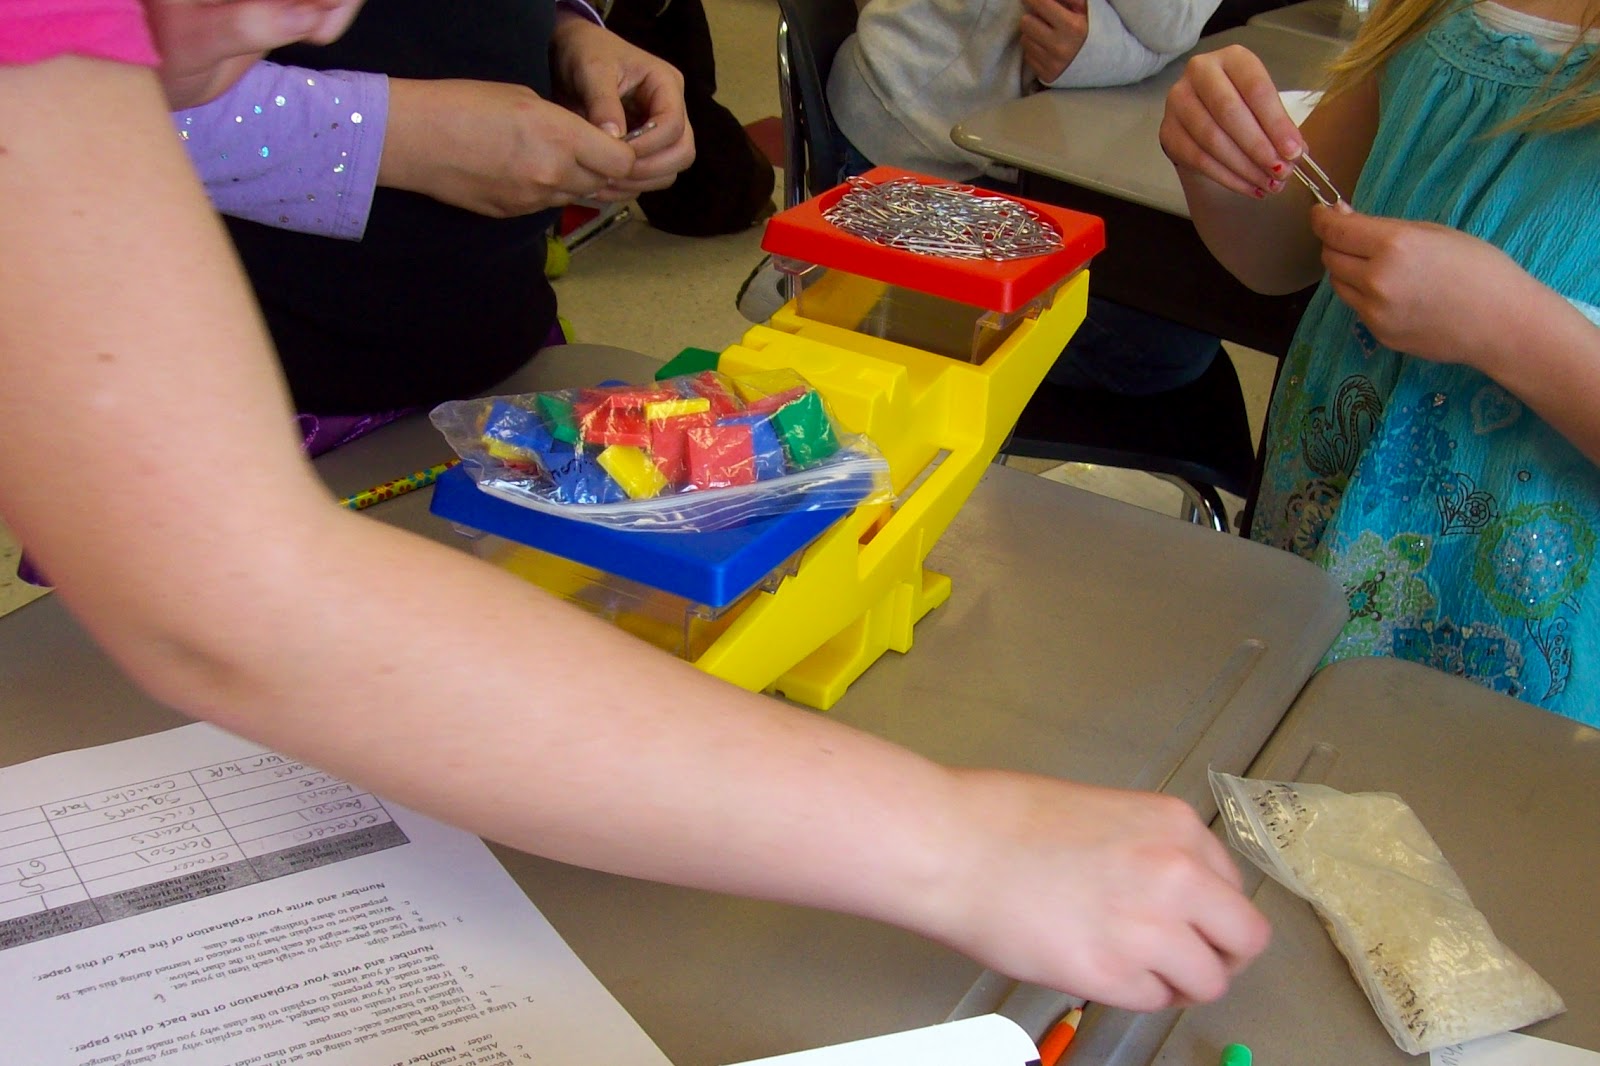
Each group received a balance scale, a basket full of items to weigh, and a recording sheet.  The purpose of the activity was to order the items from the least to the greatest weight.  The first part of the activity was for students to hold objects in their hands and compare the weight of each item.  They wrote their answers on the recording sheet. 
Part 1 

The balance scales were used for the 2nd part of the activity. Students used the same items but, compared each on the balance scales instead of in their hands.  They recorded their answers in the 2nd column of the recording sheet. 
Part 2 


The 3rd step involved using large paperclips.  The students placed 1 item at a time on the scales and balanced each item with paperclips.  The idea was to become familiar with associating large paperclips to grams.  They used the 3rd column of the recording sheet to write the number of paperclips used.
Part 3


I threw in an extra challenge.  The heaviest item was a roll of calculator tape.  The box of 100 paperclips was not heavy enough to weigh the calculator tape.  My students had to problem-solve to find a solution to weigh the calculator tape in paperclips without actually having enough paperclips.  All groups eventually realized that if they used other items they already knew weighed a certain number of paperclips, they could successfully find the weight of the calculator tape.
Challenge


Click on the link below to download a FREE Recording Sheet.  The Recording Sheet is divided into 3 sections.  You decide what 5 items you want the students to weigh.  (I use a pencil, small eraser, small bag of rice, small bag of beans, and a roll of calculator tape).  As a challenge, place one item with the other 4 that cannot be measured with all the paperclips.  Your kids will have to problem solve this item and hopefully conclude that they will need to use other items already weighed to help calculate the number of paperclips needed for the larger item.  (I store each group of 5 items in a plastic gallon baggie for easy use next year).
https://docs.google.com/open?id=0Bw-q3md5TYD_N3hucC1WaDJRUEtCbjQ5bFZCaUxidw

Thursday, March 1, 2012

Nets to Solids Card Sort

My class just finished my 4th grade geometry unit.  One of the last activities we completed was a card sort where the kids had to figure out what solids a net would make.  The categories were Prisms, Pyramids, Cubes, and "Does Not Make a Solid."  I gave each child a plastic stencil with basic geometric shapes cut out and a piece of white construction paper to draw any nets they did not know for sure.  My students were familiar with some of the nets but, there were some they had never seen.  I wanted to make sure the kids knew the shapes by the characteristics of the faces, not by the common nets that generally make a solid.
I enlarged 3 of the shapes that the students would not be able to make with their stencils and gave each group a set of these 3 nets to try out.   When they were satisfied they had the correct answer, they glued the net under the correct heading on 1/2 piece of construction paper.  


I have included the link to view this activity, Nets to Solids Card Sort.  The card sort also comes with LARGE nets for students to fold if desired, and an Answer Key.  My students used stencils this year, but, have used the large nets in the past.